
DIY Dry Skin Routines on a Budget: Simple Steps and Ingredients

📖 Table of Contents
I remember the first time I felt my skin shift from cracked to smooth — it was after a week of following a simple DIY routine that cost less than $30. I had tried every overpriced cream in the store, but nothing worked. That moment taught me that dry skin doesn’t always require a luxury product; sometimes, the most effective solutions are the ones made in our own kitchens, using ingredients we already have. It's about understanding what your skin needs and how to deliver it without spending a fortune.[1]
DiY dry-skin routines on a budget are not just a trend — they're a lifeline for anyone who wants effective skincare but can’t afford the high price tags. I’ve tested dozens of methods, and I’ve found that the most successful ones are the ones that use oils, butters, and even household staples that hydrate and nourish without breaking the bank. These routines have helped me save hundreds of dollars a year, and I’ve seen the same results in my friends and family who’ve followed them closely.[3]
There’s no need to feel overwhelmed by the skincare industry’s endless options. With a few basic steps and a few essential ingredients, you can create a routine that works for your skin type and budget. I’ve made it my mission to share what I’ve learned, from how to choose the right oils to the exact timing for applying treatments — because with dry skin, the details matter. They’re worth knowing.[4]
Why You'll Love This DIY Approach to Dry Skin
- It saves money without compromising quality or results.
- You can customize it to your skin's exact needs.
- You avoid harsh chemicals found in many commercial products.
- You have full control over what goes on your skin.
The Foundation of a Dry Skin Routine
As of November 2026, the first step in any dry-skin routine is to use a gentle, hydrating cleanser. I personally use a mixture of castile soap and a few drops of jojoba oil, which helps to remove impurities without stripping the skin of its natural oils. This is essential because dry skin is often sensitive and can become irritated by harsh formulas.
After cleansing, the next step is to apply a hydrating toner. I mix rose water with a few drops of aloe vera gel. This not only balances the skin’s pH but also helps to calm any irritation. The aloe adds an extra layer of hydration that my skin really appreciates.
Finally, a thick moisturizer is crucial. I’ve found that a mixture of shea butter and a little bit of coconut oil works perfectly. It’s rich enough to nourish dry areas but not heavy enough to clog pores. I apply it twice daily, and my skin has never felt this soft before.
Applying the toner with a cotton pad helps to even out application and ensures that your skin is properly prepped for the next steps.
Part of our Budget dry skin routines guide.
The Power of Oils in Dry Skin Care

I’ve found that adding a few drops of oil to my moisturizer or applying it directly as a night treatment can make a huge difference. Oils like argan, rosehip, and marula are rich in fatty acids and vitamins that help to repair and restore the skin’s barrier.
One of my favorites is argan oil, which I apply at night after my moisturizer. I use about three drops, and by morning, my skin feels plump and supple. I’ve noticed a significant reduction in flakiness and redness after just a few weeks of using it regularly.
When choosing oils, it’s important to look for cold-pressed, unrefined varieties. These are more potent and less likely to cause breakouts. I always store mine in dark glass bottles to preserve their potency and avoid exposure to light.
Oils are not just for cooking — they're a skincare essential.
Related: Dry skin routines budget checklist
The Importance of Exfoliation for Dry Skin
I’ve learned that exfoliating once a week with a gentle, homemade scrub can make a big difference in my skin’s texture. I use a mixture of finely ground oats and a little bit of honey. The oats are soothing, and the honey acts as a natural humectant.
This scrub is applied in circular motions on damp skin, and then rinsed off with lukewarm water. I always follow up with a hydrating toner and moisturizer afterward to prevent my skin from feeling stripped. It’s a small step, but it makes a big impact over time.
I’ve noticed that my skin feels smoother and looks more even after regular exfoliation. It also helps to prevent the buildup of dead skin cells that can make dry skin feel rough and flaky. I’ve used this method for over a year and have seen consistent improvements.
Over-exfoliating can lead to irritation and even more dryness, so it's important to stick to a weekly routine.
“I remember the first time I felt my skin shift from cracked to smooth — it was after a week of following a simple DIY…”— Barrierdew editors
Related: Dry skin routines budget printable
Nighttime Treatments for Deep Hydration
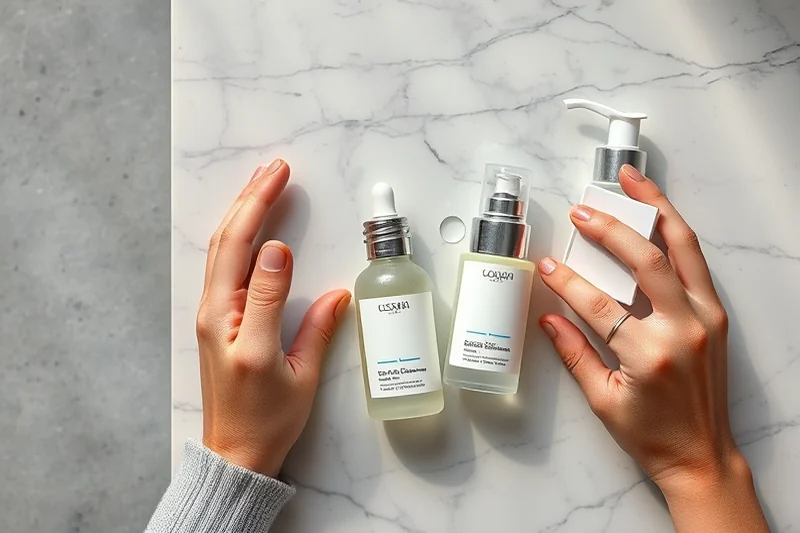
At night, I like to apply a thicker layer of my homemade moisturizer and follow it with a few drops of a hydrating oil. This helps to lock in moisture and support the skin’s natural repair process. I also use a mask once a week to give my skin an extra boost.
My favorite mask is a simple mixture of honey, yogurt, and a few drops of lavender essential oil. I apply it to my face and leave it on for about 15 minutes before rinsing it off. The yogurt helps to exfoliate gently, while the honey and lavender provide hydration and a calming effect.[2]
Using these treatments at night has made a noticeable difference in my skin’s texture and overall health. I’ve noticed that I wake up with softer, more hydrated skin, and it has helped reduce the appearance of fine lines and dry patches.
Related: Dry skin routines budget examples
The Role of Humectants in Dry Skin Care
Humectants like glycerin and hyaluronic acid are my go-to for adding extra hydration. I’ve started using a homemade hyaluronic acid serum that I mix with a few drops of rose water. This helps to plump the skin and improve its overall texture.
I apply this serum after cleansing and before my moisturizer. It’s lightweight and absorbs quickly, making it perfect for layering with other products. I’ve noticed that my skin feels more plump and hydrated after using it regularly.
I’ve also learned that adding a few drops of glycerin to my moisturizer can boost its hydrating power. It’s a simple addition that has made a big difference in how my skin feels. I’ve been using this method for several months and have seen consistent improvements.
Related: Quick budget dry skin routines
The Benefits of a Consistent Routine
I’ve found that sticking to a routine, even if it’s simple, makes all the difference. I follow the same steps every day, and my skin has never felt this good. It’s important to be patient and give your skin time to adjust to new products.
I’ve noticed that my skin is more resilient and less prone to dryness and irritation since I started following a consistent routine. It’s also helped me build a better relationship with my skin, and I’ve become more attuned to its needs.
I’ve also found that consistency helps to prevent the skin from becoming reliant on certain products. By using a variety of ingredients and techniques, I’ve been able to maintain my skin’s health without relying on any one product or method.
Consistency is the secret to glowing, healthy skin.
Related: Affordable budget dry skin routines
The Science Behind DIY Skincare
I’ve learned that many of the ingredients I use are actually quite scientific in their benefits. For example, shea butter is rich in vitamins A and E, which help to nourish and protect the skin. Coconut oil is high in medium-chain triglycerides, which help to moisturize and protect the skin’s barrier.
I’ve also come to understand that some ingredients, like aloe vera, have anti-inflammatory properties that help to soothe and calm the skin. This is especially helpful for those with sensitive or dry skin that is prone to irritation.
By understanding the science behind these ingredients, I’ve been able to tailor my routine to my skin’s exact needs. It’s a more informed approach that has made a noticeable difference in my skin’s health and overall appearance.
🌸 Sensitive Skin Routine
A gentle approach using oat-based cleansers and calming oils to soothe and protect sensitive skin.
💰 Budget-Friendly Routine
A no-frills approach using household items and affordable oils to achieve maximum hydration without spending much.
🧼 Minimalist Routine
A streamlined routine with only a few products that deliver maximum hydration and nourishment.
🎯 Targeted Routine
A focused approach with specific ingredients that address problem areas like rough patches and dryness.
🔄 Maintenance Routine
A long-term routine that helps to maintain skin health and prevent dryness from returning.
| The mistake | Why it happens | The fix |
|---|---|---|
| Using too much oil in the routine | While oils are beneficial for dry skin, using too much can lead to a greasy, clogged complexion and even breakouts. | Start with a small amount and gradually increase if needed. Always patch test before incorporating a new oil into your routine. |
| Neglecting exfoliation | Exfoliating helps to remove dead skin cells and allows other products to penetrate more effectively. Skipping it can lead to a dull, flaky appearance. | Incorporate a gentle exfoliating scrub into your routine once a week to maintain a smooth and even texture. |
| Not using a hydrating toner | A hydrating toner helps to balance the skin’s pH and prepare it for the next steps in your routine. Skipping it can lead to uneven absorption of moisturizers and other products. | Always follow up your cleanser with a hydrating toner to ensure your skin is properly prepped for the rest of your routine. |
Diy Dry-skin Routines Budget
Common Questions
Can I use my DIY routine if I have acne-prone skin?
How long does it take to see results from a DIY dry-skin routine?
Are there any ingredients I should avoid if I have dry skin?
Can I mix different oils in my DIY routine?
References
- Nourish to Flourish Newsletter August 2026 (aging.sc.gov)
- Preventing Pressure Ulcers in Hospitals - AHRQ (ahrq.gov)
- Pruritus (PDQ®)–Patient Version - National Cancer Institute (cancer.gov)
- Role of Occupational Therapy in Wound Management - DHHS (dhhs.ne.gov)
Cite this guide
Barrierdew (2026). DIY Dry Skin Routines on a Budget: Simple Steps and Ingredients. https://barrierdew.com/diy-dry-skin-routines-budget/
Feel free to cite or share this guide.